Pharos Printing on Mac
1. Verify you're on the proper network. Pharos only works if you’re connected to the campus network either with:
- Eduroam - Eduroam Setup Instructions OR
- Wired (Ethernet) Connection OR
- Campus VPN connection when off campus
UCSC-Guest will NOT work for Pharos Printing services.
2. Install Ricoh Driver
Pharos Secure Printing is particularly senstive to Mac OS and Ricoh device type. The two installers below will set up your Mac with the PPDs for most of the Copier Program's Ricoh devices.
Download the driver to your "Downloads" folder. Go to Downloads, and run the installer by double-clicking on the file, then click on the "Ricoh_PS_Printers..." icon, log in with your computer login password as prompted.
If using Windows, download the Popup Driver for CP Secure Printing from Windows.
3. Install Popup Driver for CP Secure Printing
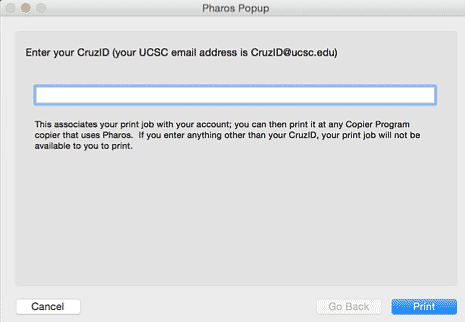
In addition, you need to install the Pharos Secure Printer Popup software using the installer and instructions below.
Download the driver to your "Downloads" folder. Go to Downloads, and run the installer by double-clicking on the file, then click on the "Popup.pkg" icon, log in with your computer login password as prompted.
4. Verify Printer
In the top left menu under the apple icon, go to System Preferences > Printers & Scanners. The CP_04_Ricoh_Secure_Printing printer should have automatically been added to the list of printers by running the Pharos Popup Installer.
If it is not there, try repeating steps 2-3 above
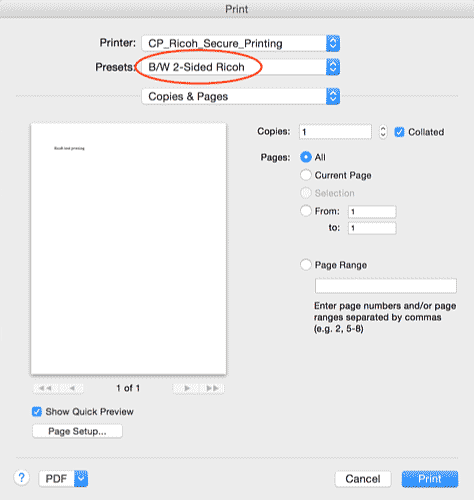
5. Set printer "Presets"
Once the printerCP_04_Ricoh_Secure_Printing is on the list, open ANY Document (for example a Microsoft Word .doc)
In the top menu go to File > Print or use the keyboard shortcut “Command+P” A print dialog will appear.
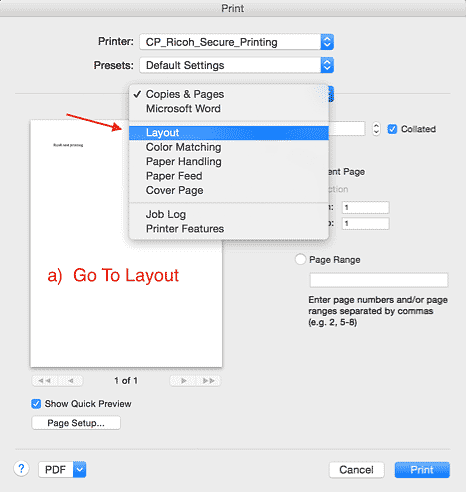
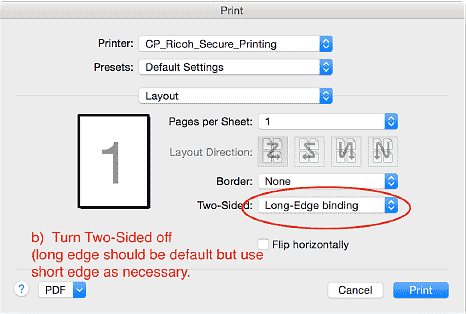
a. In the Print dialog, third dropdown menu from the top, select "Layout"
b. In "Layout" select "Two-Sided: Long-Edge binding"
c. In the same third dropdown menu select "Printer Features"
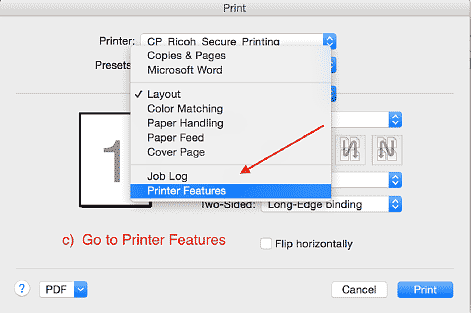
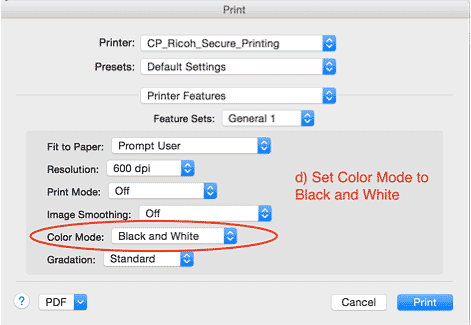
d. In "Printer Features" set "Color Mode: Black and White"
